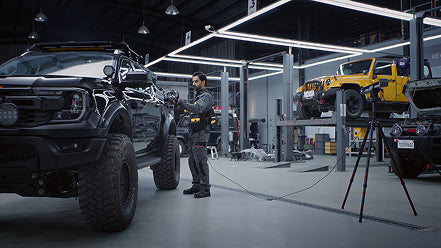
Capturing a complete 3D scan of an entire vehicle used to be a time-consuming and technically challenging task. Now, with the Revopoint Trackit, scanning a whole car has become faster and easier. Whether you're documenting for modification, restoration, or digital archiving, Trackit's multi-positional tracking and large scanning volume make it perfect for automotive workflows. In this guide, we'll walk you through everything you need to get started, from setup and surface prep to choosing your scan method and optimizing results.

Requirements
Anchor Blocks/Points
Scanning Spray
Laptop with 64GB of RAM (32GB may be enough for a small car)
Power extension cord to make it easier to move your PC and Trackit around.
You'll need at least 1.5 meters (about 5 ft) of clear space around the car so you can easily reposition the Tracker. More space is better, as placing the Tracker farther from the vehicle increases its coverage area, helping to reduce the frequency of moving the base station.
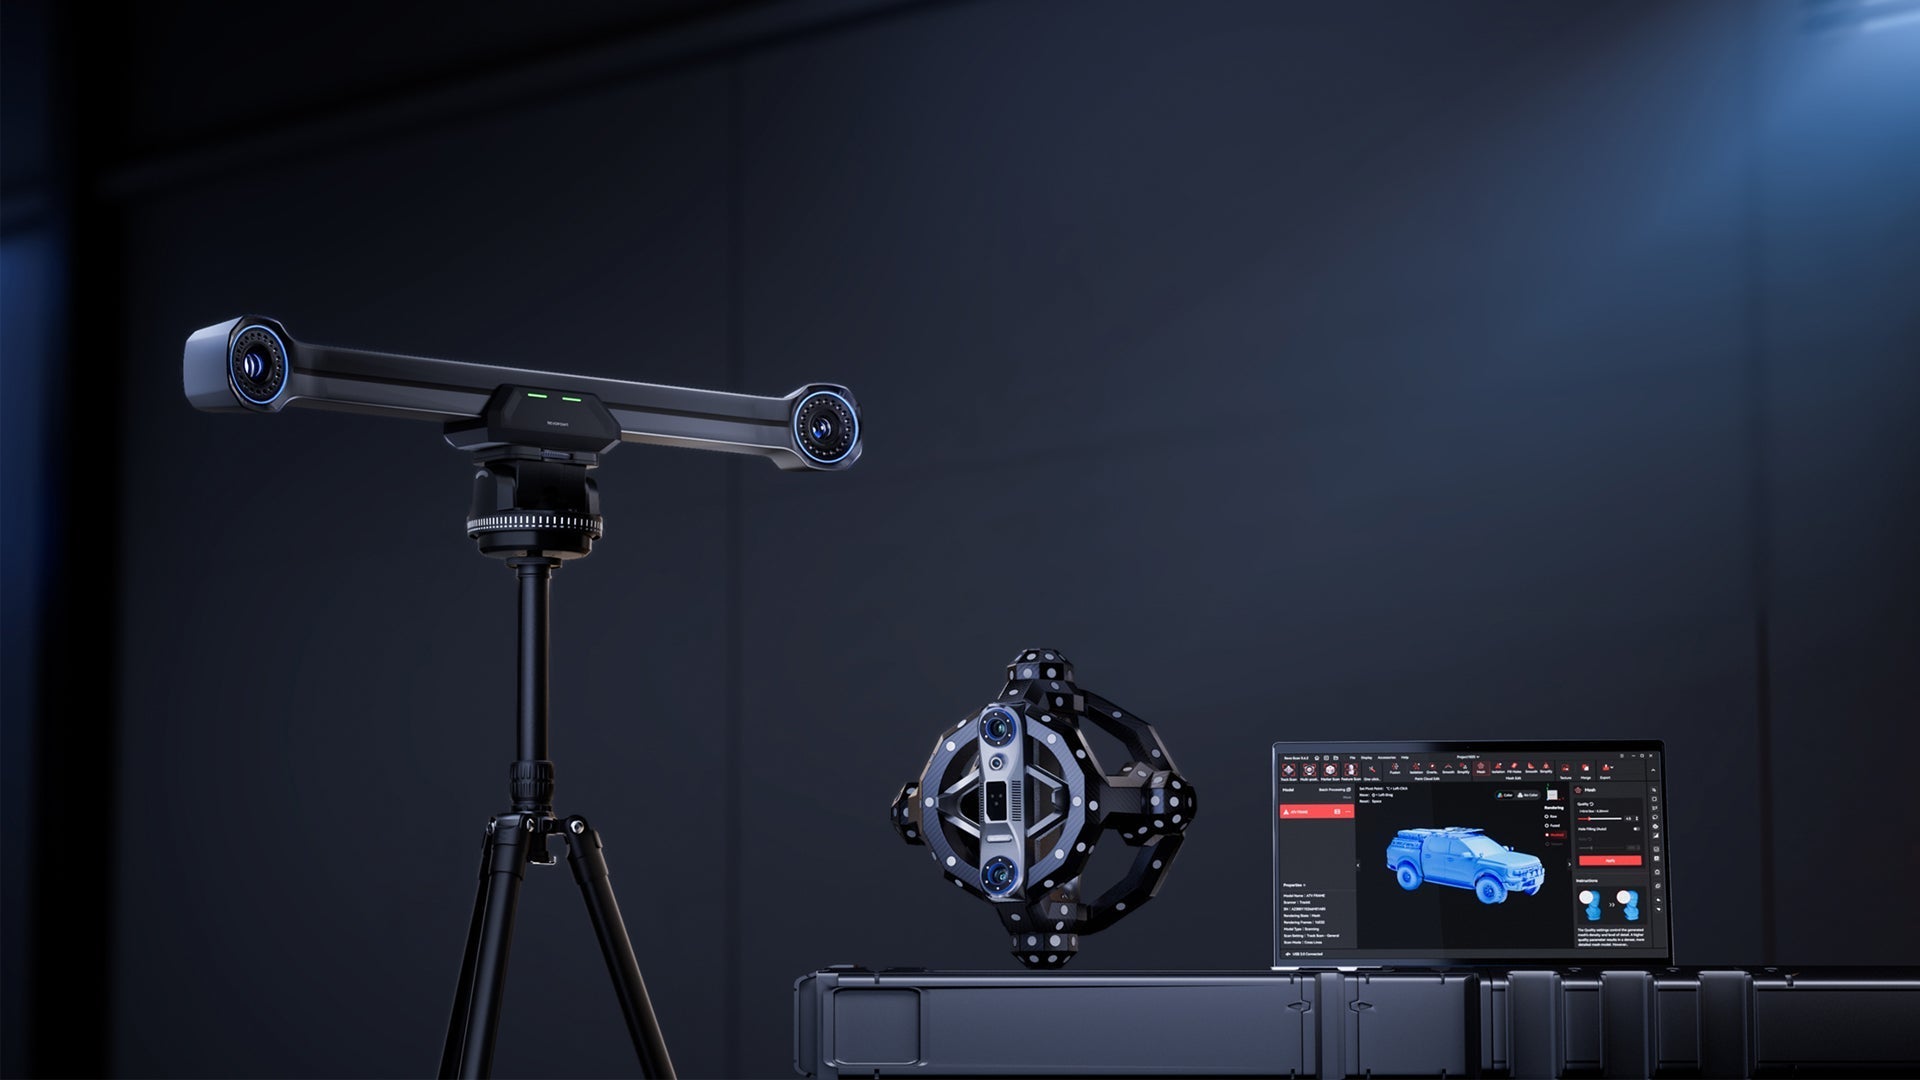
Preparing Trackit
Connect the Scanner and Tracker to your laptop using the provided cables. Launch Revo Trackit and let the system warm up for 10 minutes. It may be wise to run an accuracy test and recalibration if you have transported the Trackit to your scanning location. Once done, perform a quick test scan (e.g., a toolbox or fender) to verify tracking is stable and everything functions correctly.
Preparing the Car
Clean the car's surface to remove dust, bugs, and streaks. Apply scanning spray to any glass or transparent plastic areas you need to capture.
Break the car into logical scan zones, such as the front quarter panel and bumper, the sides (including doors and roof), the rear and trunk area, and, if necessary, the undercarriage.
Next, prepare the areas for scanning by placing anchor points, with at least 5 per frame (about 20 cm apart). Keep in mind Trackit's 1.4 x 1.5 m at 1.5 m to 2.8 x 2.8 m at 4 m tracking zones when doing this.

Preparing the Scan
After the Scanner is connected and has finished warming up, you have two options to choose from when performing the scan.
The first method involves capturing all anchor points in a single instance during the global marker scan, allowing the system to comprehend the entire environment in one go and provide a unified tracking reference.
This method is slightly faster and allows the base station to be actively moved while scanning. However, if you don't have a second person to help you move the Tracker, cables, and laptop around the car to capture all the points in one go, we don't recommend picking this method.
The second approach is to do it in stages, starting with capturing the anchor points, then scanning the area, capturing the next set of anchor points, and scanning that area, continuing this process until you've circled around the car.
This method takes a bit longer, but it's much easier for one person to handle on their own. Remember not to remove the anchor points from the previous stage until you've finished scanning the current one and are ready to move forward.
Whatever way you choose, we recommend the following scan settings:
● Use 30 cross lines for quick surface capture.
● Set the object type to metallic shiny, as most cars have glossy or shiny surfaces.
● Toggle the Large switch to automatically set the Target Point Distance to 3 mm, which is ideal for efficiently scanning large, featureless surface areas.
When capturing the global markers, make sure the base station cannot see the markers on the Scanner, as it will record them as part of the global point cloud, which could interfere with your scan. We suggest holding the Scanner behind the Tracker when capturing the global markers to prevent this.

Performing the Scan
Depending on the method you use, the process will unfold a little differently; however, the most effective way to scan the car remains the same.
Keep the Scanner at a good to excellent distance (around 30 cm) from the car's surface.
Choose a starting point and move the Scanner smoothly across the surface, as if you were painting a wall from one side to the other, to capture all the surface data.
Monitor the data quality as you scan. Bright green point clouds indicate enough data has been collected, while red or no color shows that more data needs to be gathered.

Processing the Scan
Once the scan is done, it's time to process your data. You can, of course, use one-click editing, but for a scan of this size, we strongly recommend manually processing it.
When manually processing the scan, ideally, use the fusion point distance suggested by Revo Trackit. After fusion, perform Isolation and Overlap, then, if needed, clean up any unwanted data, such as the ground under the car or any accidentally captured cables, using the selection tools.
Your point cloud should now be ready to be exported or meshed and then exported for the next step in your workflow.
Leave a comment
This site is protected by hCaptcha and the hCaptcha Privacy Policy and Terms of Service apply.